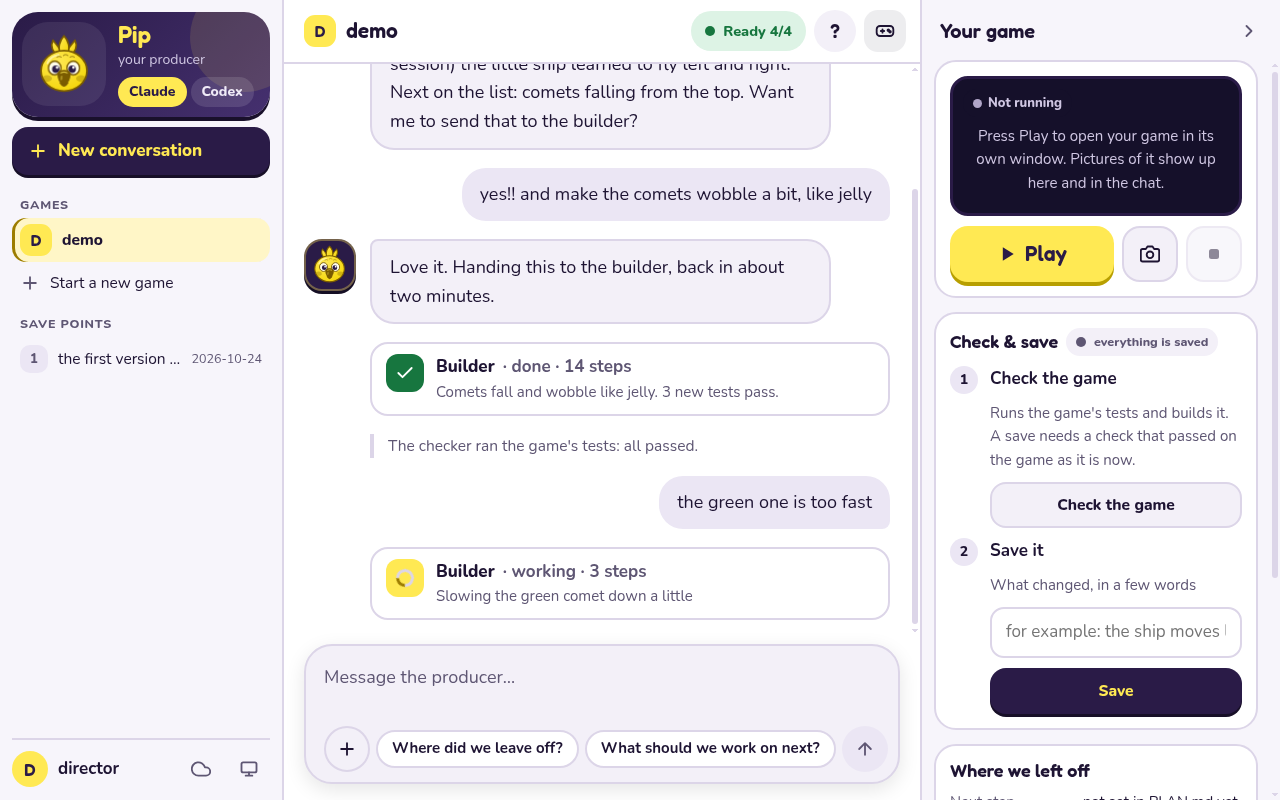
Studio, the default
One place to do everything: open it, talk to the producer, play, check and save. You do not wire up any agent yourself. Start with the quick start below, then read the guide to the Studio page.
Power users
Skip the Studio and drive the engine and the para CLI directly with your own coding agent.
Start from the para CLI, AGENTS.md and the skills in
skills/ and .agents/skills/.
The engine is paraloop (Nim + paranim + pararules): a deterministic fixed-tick loop, headless
tests, one CLI (para) and a Studio page in your browser.
Quick start
Paste one line into a terminal. It makes a parastudio folder in your home folder, says exactly
what it will do and asks before it installs anything, then offers to start Studio
(what it does, and how to read it first):
- Mac or Linux:
curl -fsSL https://pdepaula.github.io/parastudio/install.sh | sh - Windows (PowerShell):
irm https://pdepaula.github.io/parastudio/install.ps1 | iex
Already have the parastudio folder (git clone https://github.com/PDepaula/parastudio.git, or a
zip from GitHub)? Open Para Studio with the launcher for your computer:
- Mac: double-click
Paraloop-Studio.command. The Mac guide walks through the first time. - Windows: double-click
Paraloop-Studio.bat(Windows guide; not yet tried on a real Windows PC), or follow the command-by-command first game on Windows. - Linux: run
./paraloop-studio.shin the folder (Linux guide).
On Windows there is also a portable zip with Nim and the C compiler inside: extract it and
double-click Paraloop-Studio.exe (not signed yet, so Windows shows a warning screen once:
Windows guide). If anything goes wrong on Windows, start at
Windows troubleshooting.
The launchers need nothing installed first: when Nim, a C compiler or git is missing they say
exactly what they would install, from where and into which folder, and install it only after you
type y (Enter means no). Before opening the page they print the same startup checks it shows
(tmp/para studio --check). What was checked on each system is in
platforms.md. To type the commands yourself instead, see
Set up from a terminal.
What you get
- A fixed-tick simulation with a seed and a state hash, so a run is the same every time and a bug can be replayed.
- Game rules as facts in pararules; content as table rows in
data.nim. - A sprite and text renderer on paranim (OpenGL) with a pixel font, input, and synthesised sound with no sound files.
- Native and web (wasm) builds from the same code.
parafor the whole loop:new,test,check,build,sim,shot,studio,saveandbackup.- Headless tests: game logic never touches a window, so
para testandpara checkrun anywhere. - Pixel-art checks and cleanup (
para art lint,para art fix). - The producer voice and its helpers (builder, checker, scout, art) for Claude Code and Codex.
- What may come next is in the roadmap.
Your game is yours
Each game lives in games/<name>/ and is a git repository of its own (para new makes it), so its
history and save points never mix with the engine's. para save keeps save points there.
para backup is the only thing that uploads: it pushes your game to a private remote
named backup that you set up yourself, after you say yes, and never to this project.
Where to read next
- The Studio page: opening it, the startup checks, starting a game, what the producer can change, and what to do when something goes wrong
- Mac, Windows, Linux and what was checked where
- The
paraCLI: everyparacommand - The engine: the folder layout, sound and the profile store
- Art:
para art lint,fixandsheet - Testing: running the tests, the local loop, what CI runs
- Publish to the web: the wasm target,
para web smoke, packing a build - Roadmap: directions, not commitments
- Writing rules, with worked examples, and AGENTS.md: the producer's instructions and the engine's rules of the road
- For maintainers: Studio internals and how this site is built